Chore Charts

on Monday, September 23, 2013.
No Comments »


Did you grow up doing chores? I grew up doing chores when I came home from school everyday and then bigger chores every Saturday morning. I dreaded chores as a kid but now, looking back as a mommy, I recognize how those dreaded chores taught me how to keep a house and take care of my things.

Having toddlers in the house, they aren't quite at a point psychologically to dread chores. In fact, they really enjoy them and I think it makes them feel like "big kids" as they become proud of small accomplishments.


Hence, the chore chart I came up with. It's simple, it's made with chalkboard paint (love) and the chores are illustrated visually because my little kiddos can't read yet!

Here's what you need:
 
a pack of wooded door handle charts (found mine at Walmart)
chalkboard paint or chalkboard spray paint
chalk
clothes pins
contact paper
 
Here's what to do!
 
Paint the door handle charts front and back with chalkboard paint.
Let dry.
Rub the charts with chalk and wipe off with a clean, dry rag.
I used Microsoft Word to find little pictures to illustrate the chores and then I printed them out on cardstock.
Use contact paper for the front and back of the label paper and then cut the labels out.
Hot glue the labels on the clothes pins.
Get to doing chores!!
 
Need some ideas for Toddler Chores?
Make bed
Brush teeth
Put clothes on
Go potty
Clean toys
Water plants
Empty bathroom trashcan
Fold washcloths


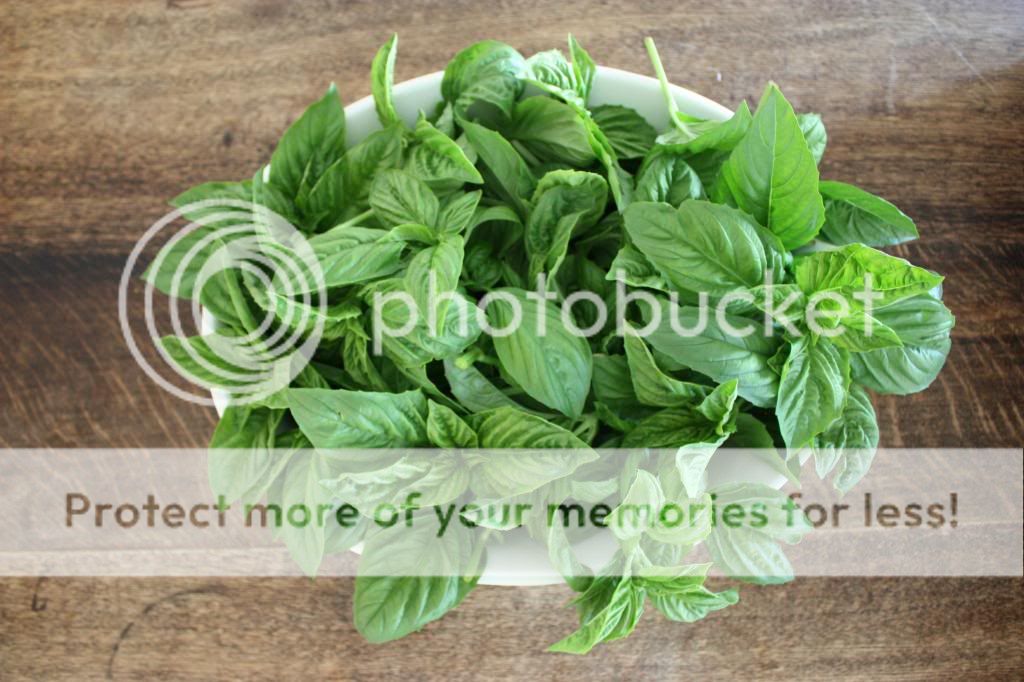
Fresh from the Garden: Basil

on Wednesday, August 28, 2013.
No Comments »

 
We're having so much fun with our garden everyday. The girls have had so much fun learning how little tiny seeds make the big foods that we get to eat.
 
We are definitely in a season of abundance with our basil right now. The girls are literally picking bunches of it every morning and eating straight leaves!! And what to do with it all the rest....?
 
Basil Pesto (Dairy Free)
 
5 cups of fresh Basil
1 cup pecans
1 cup of EVOO
10 garlic cloves
1 tsp salt
1 tsp nutritional yeast**
 
Put it all in a food processor and blend!
 
**What's nutritional yeast? I'm really not sure what exactly it is, but a lot of dairy free people use it in substitution for a parmeseany type of taste. The one I use looks like this. I put it in pizza crust dough, pesto, pasta, etc.

First Day

on Tuesday, August 13, 2013.
No Comments »


Lyla started her first day of Pre-K homeschool yesterday! Yes, we do things a little different around here but homeschool is something that has really been on my heart for a long time now... And needless to say, Lyla has been so excited to officially start to learn at "homeschool."


This year we're working through a curriculum called Weaver Interlock. I chose it for many reasons but the most important reason was that it is a Bible based curriculum (Bible based meaning the Bible is woven through any and all subjects instead of Bible class being just a single course within lots of subjects). Interlock Pre-K/Kindergarten is very big on learning through crafts and hands-on projects, perfect for my little chicks. It also has multiple learning levels within the structure for when your child might have already mastered, let's say, the pre-k level math lesson so you can move on to the kindergarten level in areas where it's needed.

We're doing it three days a week, for roughly 2 1/2 hours a day. Adah works through most all crafts and hands-on projects between playing around the house. We sing songs, learn poems, learn scripture, and even have physical education.

It's a perfect type of curriculum for a person like me because it tells me exactly what to teach and what to prepare for the school day. All I have to do is prepare and read the lesson plan the night before the next homeschool day so I know what's to come. Every week Interlock also gives me a shopping list of little craft supplies we'll need for the coming school week.

With one day under my belt, I feel really excited about our future homeschooling days to come. It's been so heavy on my heart to teach my children about the Lord and his Word and I'm so thankful to have a learning curriculum that can help me present it them in a way that glorifies Him!!


Let's Clean....Naturally!

on Friday, August 2, 2013.
No Comments »

If you're a momma like me, you'll easily recall yourself telling your littles to stay away from under the cabinets because "Chemicals hurt you, OW, yucky yuck." That's toddler talk for "Mommy's gotta have this stuff to be able to keep our house clean, and if you ingest it, I'm going to have to explain this to Dr. Daddy :)"

However, in the name of embracing my "of the earth, Ashleyness" I'm getting rid of chemicals that are yucky yuck and I'm replacing them with alternatives that if for some reason my kids got into them, it's only going to taste disgusting...

So, let's clean....naturally, friends!

You'll only need these common household ingredients....


To make an ALL PURPOSE CLEANER:
16 ounces of hot water
2 teaspoons of Borax
1/4 teaspoon of liquid dish soap or castile soap

Put in the Borax and add the hot water. Shake it all around until the Borax dissolves. Add the liquid soap and do a small swish (don't shake it) and start cleaning your kitchen!

To make GLASS CLEANER:
1 cup of distilled white vinegar
1 cup of warm water
1/2 teaspoon liquid dish soap
3-8 drops of essentials oils (if you hate the way vinegar smells)

Add the vinegar and water. Swish it together, and then add the liquid dish soap and do another small swish. Now we can see ourselves in the mirror past the tooth paste sprays (just keeping it real)!


Go ahead and mark the bottles so you know what to use where, because mommas are busy and sometimes we can make mistakes too!

Building Vegetable Gardens

on Monday, July 29, 2013.
No Comments »

One of the first things Tyler and I DIY'ed to our house in Oklahoma was build vegetable gardens. Wanna know how we did it?

First we decided on making three 4x10 beds. Our beds are made with Douglass Fir wood. It's not pressure treated and I chose it that way since I didn't want the chemicals from the wood to seep into my soil. This is a organic vegetable garden you know! We put little posts in each corner to stabilize and screw into.

And, since we've had a surplus of moving boxes, we dug our grass out of the three plots, layed the bed forms on the plots and covered the insides of the beds with cardboard to prevent any Bermuda grass from creeping it's way in...


We took a bunch of limbs that we had trimmed off our trees from our backyard as "fill" for our gardens. This will eventually decompose and add nutrients to the soil will bulking up the garden bed.


And then I soaked the limbs and cardboard down to get them ready for decomposing.

Next, I used a website to calculate how much soil I would need to buy and what ratios. Since my beds are 4x10, I needed 27 cubic feet of soil mixture in the following ratio:
60% topsoil
30% compost
10% peat moss
So, for my gardens I used 16 bags of Hapigro Topsoil, 8 bags of compost (6 organic mushroom compost and 2 cow manure compost), and 1 cube of Mother Earth peat moss.


We filled the beds up with the mixture and sweated like crazy as we ho'ed it all together to get it nice and mixed.

We chose to make our walkways out of light shredded mulch and we made tripods out of some old canes we found on the side of the road back in Texas (thank you Jenny and Trace for spotting them).

This is what our garden looks like right now since I forgot to snap a final garden picture after we finished it all... I was tired by then!!!

What's growing in my garden? Well, that post is to come...

Paper Cone Dolls

on Thursday, July 25, 2013.
No Comments »

My girls have a thing for crafts. We usually try to do a little something every day and it typically become their favorite toy or favorite thing to tote around the house for the day.

Hence, these adorable paper dolls I found on Pinterest. You can look all over the Mr. Printables website and you'll find all sorts of wonderful paper things to download and enjoy. Go ahead, look over there...


These things are easy peasy. Print, cut and glue and your girls will be having hours of fun. At least, it made my littles happy!


Gotta love something free, simple and creative. Thanks Mr. Printables!!

Gluten Free Corn Dog Muffins

on Tuesday, July 23, 2013. Filed under: , ,
No Comments »

One of our favorite lunch time snacks is corn dog muffins. They are easy to hold, don't make a lot of mess for Mommy to clean up and they have a long time kid's favorite food peeking inside of them, HOT DOGS. So, here they are all wrapped up in g/free goodness!


Get your bowl and whisk ready ladies....

You're gonna need:
adapted from Weelicious Corn Dog Bites

1 3/4 cups cornmeal
3/4 Bisquick g/free baking mix (or any other g/free baking mix)
1 tablespoon baking powder
1 teaspoon baking soda
1/4 cup honey
1 1/2 cups unsweetened almond milk
2 eggs
1/4 cup coconut oil
3 beef hot dogs (applegate organic is what we used)

Preheat the oven to 425 degrees. Mix all the dry ingredients together. Then get all the wet ingredients in a nice little hole in the middle of the dry ingredients (minus the hot dogs). Get your little helpers to mix it all around for you. Slice your hot dogs into little coins. Spoon a dollop of the cornbread mixture in the bottom of a mini muffin pan that has been sprayed with cooking spray (olive oil spray or coconut are best). Lay the hot dog coins in each muffin and spoon more cornbread mixture over the top. Cook for 10 minutes.

We eat them with mustard...or ketchup... or plain. Share and enjoy!